

- Excellent components
- BK is the OEM manufacturer for REL subwoofers
- Attractively priced ; you are buying them directly from the OEM and they make virtually no marketing (except the word of mouth on the Internet)
- They're UK built
Although everyone knows they're very well manufactured and excellent purchases... they come with a major issue: they forgot the wife acceptance factor. And the name "Monolith" certainly does not help. Which wife would want a huge wooden monolith sitting in her living room?
This was exactly the problem a friend of mine was facing: he quickly realised his wife would never agree with him spending the cash for a big block of wood sitting in the living room. This is the very reason why he asked me whether we could build one ourselves. He figured if he came back with a beautifully built subwoofer that he made himself, his wife would never dare to say no. And the story proved he was right.
 |
| Boards Dimensions |
The point of this project is to build an acoustically identical enclosure to the the orginal BK Monolith plus and add its components purchased from BK and end up with a "home-made" monolith+ AND win on the wife acceptance factor.
We had to make sure the enclosure we decided to build had the exact same inner dimensions as the original from BK. This is quite easy as BK provides the external dimensions and said they use 25mm thick veneered MDF. We bought pre-cut pieces of 1.8mm thick MDF to build a box with the exact same inner dimensions. We used thinner MDF because instead of veneering, we will use real 1cm-thick oak flooring to finish it.
 |
| Pre-cut MDF boards we purchased |
 |
| Making the groves in the enclosure boards for the bracing |
We then drilled holes every 10cm (or so) to secure the enclosure with screws:
 |
| Boards with the screw holes every 10cm |
 |
| The enclosure starting to look like a box |
 |
| Cutting the oak flooring |

To make a circular hole you can either saw it manually (approximately) with a jigsaw, buy a router jig or build one yourself. In this case, we used an old drill bit (a long one). As drill bits are made of hard metal, we were happy to use a cheap bit as the metal quality was average and therefore easier to work on:


- Left: filing the drill bit to make the end flat ; I did this because it is easier to make a hole through a flat surface.
- Right: cutting the tip of the bit to make it fit in the router case.
The objective of this 'hack' was to use it as a compass to make the round shaped holes with the router in the subwoofer enclosure (you attach one side of the compass to the centre of the hole and spin your router around it).
Chronologically, we then received the subwoofer components from BK (precisely the same ones as the ones from the BK Monolith+):
The amplifier plate
This amplifier plate is rated for 500w RMS and made by hand out of the finest components. I won't go through its specs as they can be found here. I'd just like to add that it was extremely well packaged in a small crate and that I was impressed by the finish of the plate and its packaging.


The LAB-12 driver from Eminence
This one is just insane! Originally designed especially for subwoofers for a horn loaded enclosure engineered by Tom Danley, it has incredible specs for a driver of this size (even if it is huge: 12", approx 30cm).The one I ordered was a 6 Ohm driver rated for 400W. Note that Eminence also produces the modified LAB-12C (500W, 4Ohm). It would in theory have more interesting specs for this application but I read (somewhere) that these extra 100W are only interesting for higher frequencies and not the low ones we're interested in so we stayed to the regular LAB-12 that BK uses for its Monolith+. We supposed BK knows what they're doing anyway.
 |
| The LAB-12 compared to a clothespin |
The port
Due to bad planning we ended up with two ports: the original Jetset 100 and the modified one from BK. These have exactly the same form factor and both flared ends are so identical they probably come from the same factory. Both tubes have the exact same dimensions. The only difference is that the BK one is made out of cardboard while the original Jetset 100 is made of plastic (ABS?).
We wanted to build a BK Monolith plus replica and therefore used the cardboard tube but I'm convinced using the Jetset one would have yielded just the same results.


 Accessories
We ordered 4 feet for subwoofer and that was an excellent choice. These feet are made of metal and very heavy. Definitely worth buying (we hesitated with wheels ;-).
When we received the order we also received lots of interesting things such a low and high level input cables (which seemed really well built) and screws.

Bracing the enclosure
We didn't have the precise dimensions of the bracing BK uses so we decided to base our bracing on photos and diagrams found on the Internet:
 |
| Enclosure with the bracing in place |
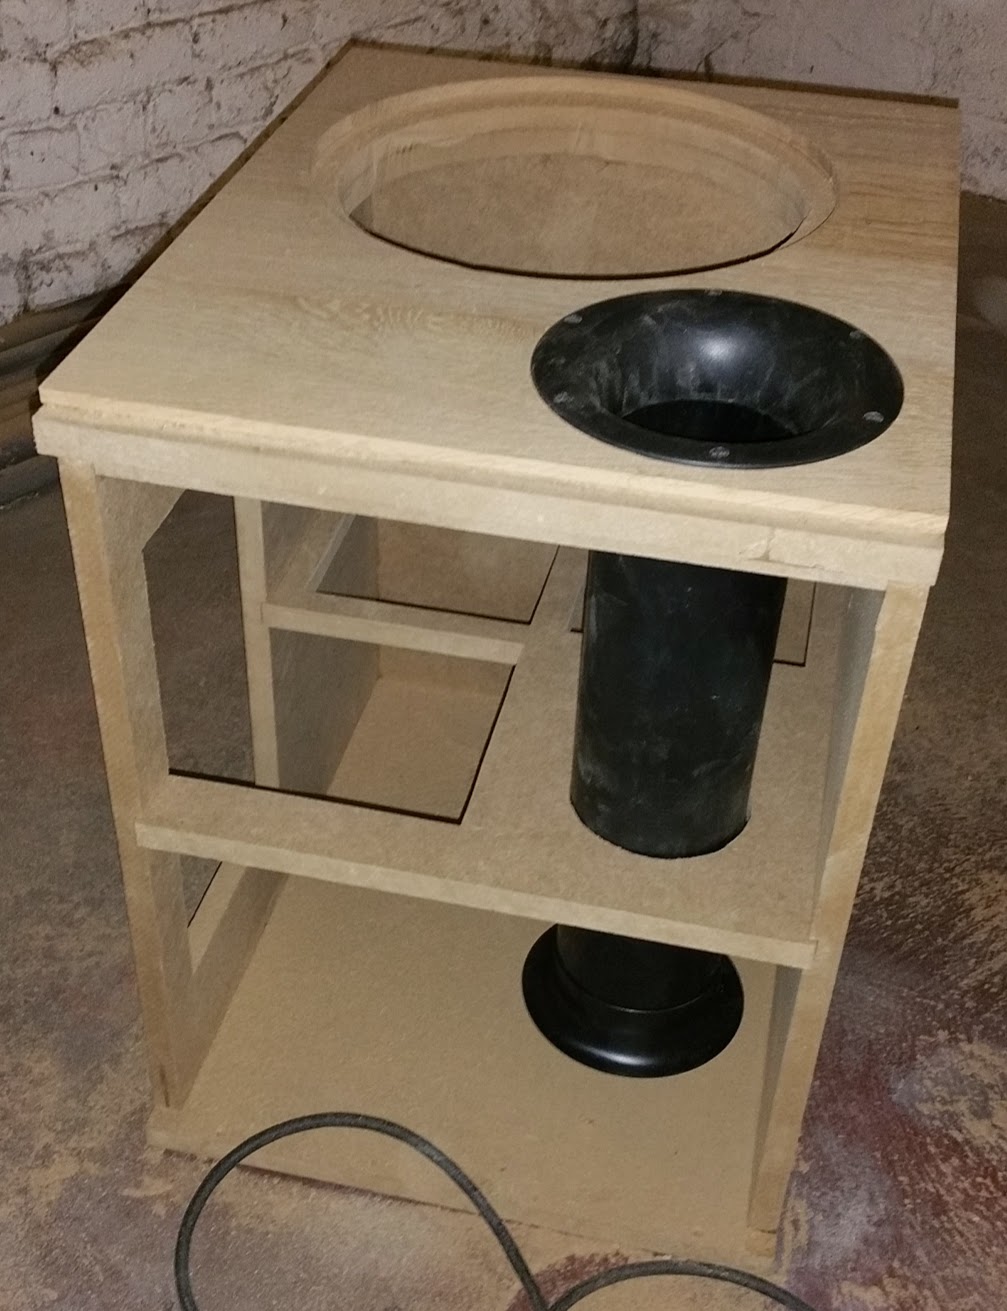
Making circular holes on the subwoofer bottom
Having received the parts and built a compass for the router, We decided to make holes for the diver and port. You can see the router at the back with the picture with the home made compass still attached.


In both cases, we had to use both the router and jigsaw to finish the hole. You can clearly see on these pictures that I tripled the bottom side of the subwoofer with an extra board of MDF. The bottom has a thickness of 46mm (18+18+10).


Oak flooring instead of veneer
Veneer looks so fake ;-) Ok, maybe not but we wanted something that came with a bit of challenge. We glued the oak with polymer glue this time (we had used white wood glue for the inner part):


Dealing with uneven wood
The oak flooring I had was a little uneven (had curled a little due to moisture?) and when we glued it to the speaker, we ended up with differences of up to 4mm! The picture below is not very clear but we used the router attached to a piece of wood to level the surface.


Sanding
This is long, very long and tedious. We started with rough sandpaper (40) to remove any major irregularities and progressively moved to thinner grain (120). We also used wood filler to fill the small gaps.

Finishing the subwoofer
This was the easiest part: screw the port, driver and amp plate.The amp plate needs to be connected to the driver with two wires (we used 2.5mm² cable).


The finished subwoofer
My friend now has his subwoofer -which was very well received by his wife- (he was even congratulated) and they lived happily ever after ;-)

Weight: 48kg (we almost broke our backs ;-)
Note on costs: we do NOT want to know how much building this subwoofer cost him as it is certainly more than what BK charges for the finished thing... delivered... except that this one came with a good wife acceptance factor and that's priceless!